Personal Project Exploratory Practice
Mind map
statement of intent
Aspiration
The fact that he conveys everyday life into something magical and makes you fall in love with nature. His work is targeted to all audiences and his style is very memorable. I love how detailed the backgrounds are in his films which makes the animation visually pleasing
Motivational
Technical benchmark
Mood boards
Initial character designs
Initial sketches
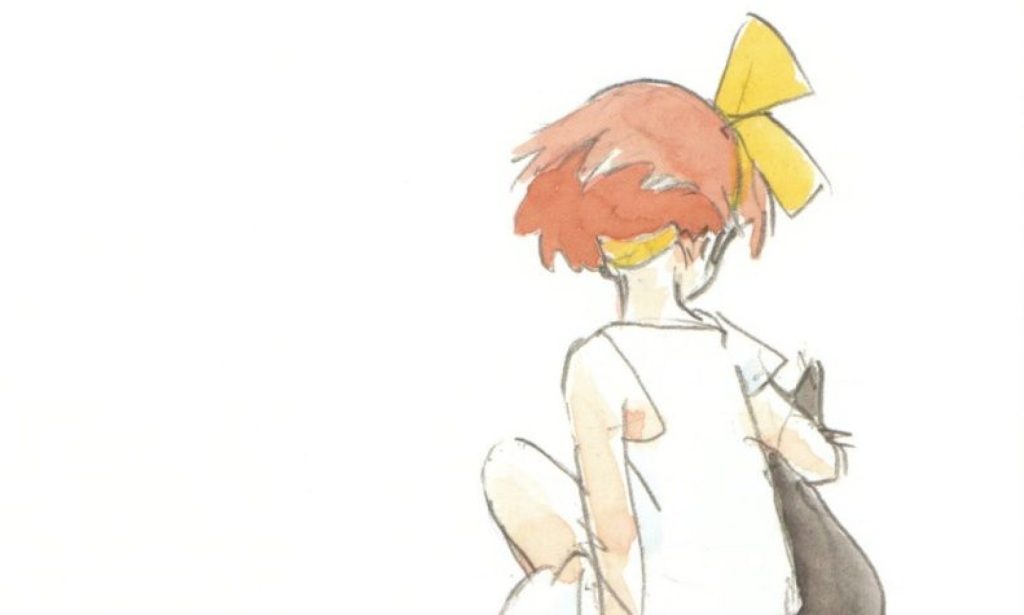
Concept art
In this concept art I used a textured brush for line art and colour, for the characters I used simple shading because it would make it easier to animate. I spoke to some of my tutors about the style of eyes because I wanted to get some feedback and we discussed how to dotted eyes seem more organic with the sketchy look. With the style of line art I also have to consider that by using a textured sketchy brush that it will create a boil affected on the line art, to see how this would look I plan on doing a test animation in toon boom to see if it adds to the sketchy style in a good way. If it looks to messy I’ll use a clean brush for line art however to use this to my advantage I could possible use a more textured brush alongside a textured background at the begging because its a more darker scene it will help communicate the panic and uncertainty the characters are feeling witch will contrast to the rest of the animation which will be brighter and cleaner.
Character designs – little sister
![]()
Older sister (the main character)
![]()
Brother
![]()
Son/foster uncle
![]()
For my characters I wanted them to suit the backgrounds I was planning, because my film is set in autumn I used cool tones. My characters are based on real people and I was considering making the characters accurate to my real-life references initially I decided to go against this because I felt that I was exposing myself and making it too personal. However, I realised that in the end I subconsciously made the characters resemble them on how they look currently rather than the period the film is set in. I found this interesting because the process of making this personal film has somehow shown a subconscious part of me that I wasn’t ready to show until I could communicate it in this way.
Social worker and foster carer
![]()
Initial storyboard and narrative
The storyboarding process proved to be challenging and at first I wasn’t sure why. After receiving feedback I realised I removed most negative elements because I wasn’t ready to process them fully yet. Because of this, the true emotions i felt were held back both in the storyboard and my vision of the animation Itself. After seeing the problem for what it is I decided to finally add the sad reality of the dark side of the narrative. As much as focusing on the positives helps, there can be no rainbow without rain.
Storyboard
Background design
Animatic
(1) Personal project “ finding home” animatic – YouTube
My animatic and storyboard faced a lot of changes as when I finished making it I asked for feedback and because of this I changed some of the senses to drive the narrative better. Because this is my first time doing a longer short film I realised that I found it difficult to know the timing of things because my animatic is shorter than my final piece. I think this is because during production I would add more movement to the characters or hold frames. Because of this I wasn’t able to tell the musician Im working with how long the music should be but she was very understanding of this and we disused how she would make it longer than 2 mins which is works because the music doesn’t start till act 2 so I would have plenty of material to work with. I think to avoid this happening again next time I will make sure to add more keyframes in the animatic.
For the initial background designs I stared to colour my sketches but I didn’t like how it was turning out because it wasn’t liking the style of my characters and it was too detailed so I’m going to be doing a lot more research on different styles used in past 2D animated films to get inspiration.
I started experimenting with different brushes and styles and I ended up likening how the sketchy style looked because my initial background was way to realistic for the style I was imaging .
Proof of concept
(1) proof of concept – YouTube
My proof of concept was very useful because it help me determine how long the animation process would take, but it’s all well and good directing and designing the look of the animation but making the proof of concept meant it was time to bring it to life which proved to be difficult at my first attempt.
It took me 3 times to finally get to a stage where I was confident that I can animate these characters. This is very clearly shown in my initial proof of concept where the characters look lifeless. With help from peers, tutors and researching more about post production I got rid of unnecessary scenes and added more animation and shading the characters. Another thing I notice was when animating the begging I found myself rushing, part of me wants to think that this is because I have a deadline but I know that it’s because its a sensitive scene for me personally, this meant that I was again holding myself and this animation back from making a scene I can be proud to show. This was bothering me and I began to hate how everything was looking so it was important for me to accept that for the audience to understand my film and the emotions of the characters I needed to show it. Now I can happily say that I’m pleased with how the begging looks because I took my time working on it and receiving feedback. I’m happy this happened because I feel like I archived something that I was initially scared to do and I felt ready to present this to my class
Initial proof of concept
(1) new proff of concept version 2 – YouTube
Final film
(1) Found Home (Animated by Victoria Richardson ) – YouTube
Critical appraisal
Overall I’m proud of how my short film turned out and I feel this was an important film to make where I’ve learnt a lot during the process.
For my first short film of this length, I’m not overly proud of the animation and movement, but because of this, I can see where I need to improve and focus. One is, learning how to properly use time charts to see how I can exaggerate and use the correct animation principle. Even though I know the principles I found that I was too over-excited to finish the film, and that I wasn’t taking my time to focus on the movement. I was also nervous about the time I had to complete it. I was more concentrated on the overall aesthetic of the film which is still an important aspect however I wasn’t initially confident in my animation abilities. I felt this held me and the film back from reaching its true potential. To overcome this I had many discussions and feedback from peers and tutors, and when they mention that a scene seemed to rushed, that’s when I realised that I need to slow down on what I’m doing and take the time to let my creativity work. I began to use the skills I learnt from my toolkits which proved to be very helpful. Despite this after watching the final film, instead of feeling like it was not good enough, I felt excited to expand my abilities by practising on shorts and GIFs. I worked hard on this project and I am happy with it, I definitely learned more about the animation process and I’m now more confident in toon boom, after effects and premiere pro, I made many mistakes with them which is good because now I know the right tools to use to export work correctly and efficiently.
I now have a better understanding of post-production after researching and experimenting with it. The main mistake I did was animate the colour on the same layer as the shading which made my process longer, now for future films, I know to either animate them separately or just animate the shadows lines and edit them in after effects.
Towards the end of the process, I began to feel worried that I wasn’t going to complete this project by the deadline however I stuck to my schedule and figured out how I could compromise on some scenes which resulted in cutting the initial ending because I felt that it didn’t have a significant role in the narrative and that I could imply it with one scene in the credits where the drawing from the beginning of the film is hung in the fridge. It’s important for me to practice making sure I organise my time not only for deadlines for future projects in the industry but for my health. When starting this project I made sure to keep in mind that I wasn’t going to let myself stay up all night and work because it was important for me to do my best work and I can’t do that if I let myself be overworked, I learnt to create a balance.
At the end of the project, I realised that I also had grades in mind and this was something that I always did because I wanted to make sure I get the best grade I could, however, I began to obsess over the gradings of my film. this opened my eyes to the fact that at this time in my artistic journey, I need to remember that I’m still learning and that it’s important to stay passionate about my improvement and progression and see any failure as a positive thing that will help me become better at my graft. Getting a good grade is important but I feel like I’ve escaped that mindset and I will keep practising and improving. During this period I went to a lot of animation meet-ups and talk and I’ve spoken to many artists and directors in the industry the advice they give me on their own experiences helped me to feel even more proud of this project and my overall improvement.
toon boom harmony rigs
pickle changing size practice – diforming
Tool kit 4 the elements
water exercises
Fire exercises
smoke
Experimental Workshop 2D animation with Mario Radev
Exquisite Corpse project
In this project we collaborated as a class to create a exquisite corpse animation and to do this we each draw a still image/frame, then the person next to us would create a animation using my still image. this was then repeats through the class in order to create a short film. after finishing the animation we then did each others sound design.
drawn frame by me (Vicky Richardson)
My starting frame drawn by Ash kashis
The animation I crated using ash’s frame as a stating point and ending on my drawn frame
sound design I did for Carolina Borgia’s animtion, her starting frame was my ending frame
Exploratory workshop, Stop motion with Chris Eales
week 2 building a model city experiments
animation tests and models
understanding how to manipulate an object to create something new (paper)
NHS animation arts pathway
Final animation
Work in progress
NHS project final presentation
client presentation 1
client presentation 2
videos of animatic and behind the senesce
Toolkit 3 After affects
For the first lesson of tool kit 3 we learnt about moving layers in after affects to create a parallax background .
first we illustrated a background making sure the sizing of the canvas was right and that everything is on a separate layer ready to animate
Behind the scene of making the background
Imformed Practice
![]()
Gallery visit
Video essay Background in animation
Final essay and planning
mind map
essay planning
Final Essay